Textastic
WARNING: Severely nerdy post coming up about Text Editors. If you don’t care about the combination of the following words and phrases:
then please feel free to, in the politest sense… jog on.
If you want to up your game, get yourself a free Dropbox Account, grab your text editor of choice and learn Markdown.
Why Dropbox?
Dropbox1 will give you the magic sauce you need to let you edit your files from anywhere. Dropbox is a simple, but incredibly powerful, cloud based file synchronisation service. Crucially, it is free. Create a file in the dropbox folder on your PC, edit it on the way home using you iPhone/Android tablet/iPad, finish the edits on your home PC or Mac. Everything is automatically kept in sync and everything is backed up.
Why Plain Text?
The answer to this is simple. Every computing platform ever created can read and write text files and usually come with a free text editor. Text files are the ultimate in cross platform portability. I hate messing around with different word processors on different platforms. Microsoft Word is powerful, bloated and not available on Tablets (well… not any tablets worth using).
Why Markdown?
Markdown lets you add rich formatting whilst maintaining a very simple, very easy to read, standard text format. Both are well supported on multiple platforms. You will find any number of text editors on the Mac and iPad that have built-in support for Markdown (I’m sure that there are plenty of Windows offerings)
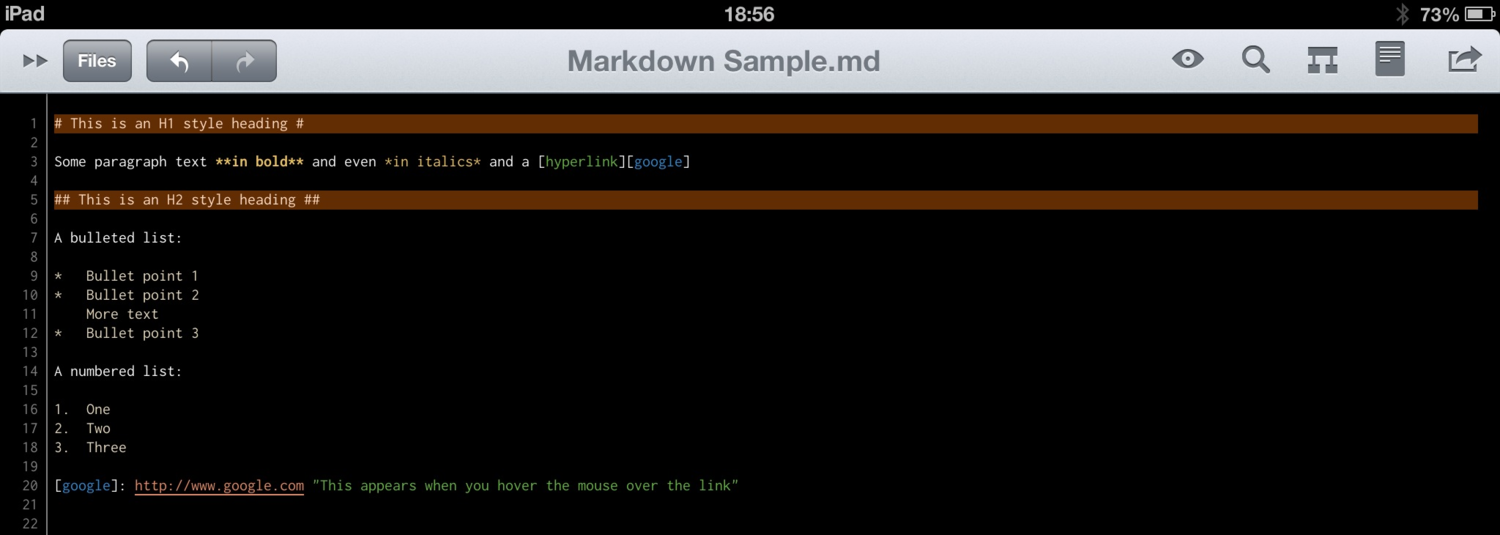
The basics behind Markdown are simple and it really won’t take you long to learn. The syntax was invented by John Gruber and is fast becoming the defacto standard for text nerds. Many blogging engines and CMSs have built-in support for the syntax. In fact, this entire blog post is written in Markdown (as are all posts to this blog). Download a text editor from the iOS App store and chances are it will support Markdown.
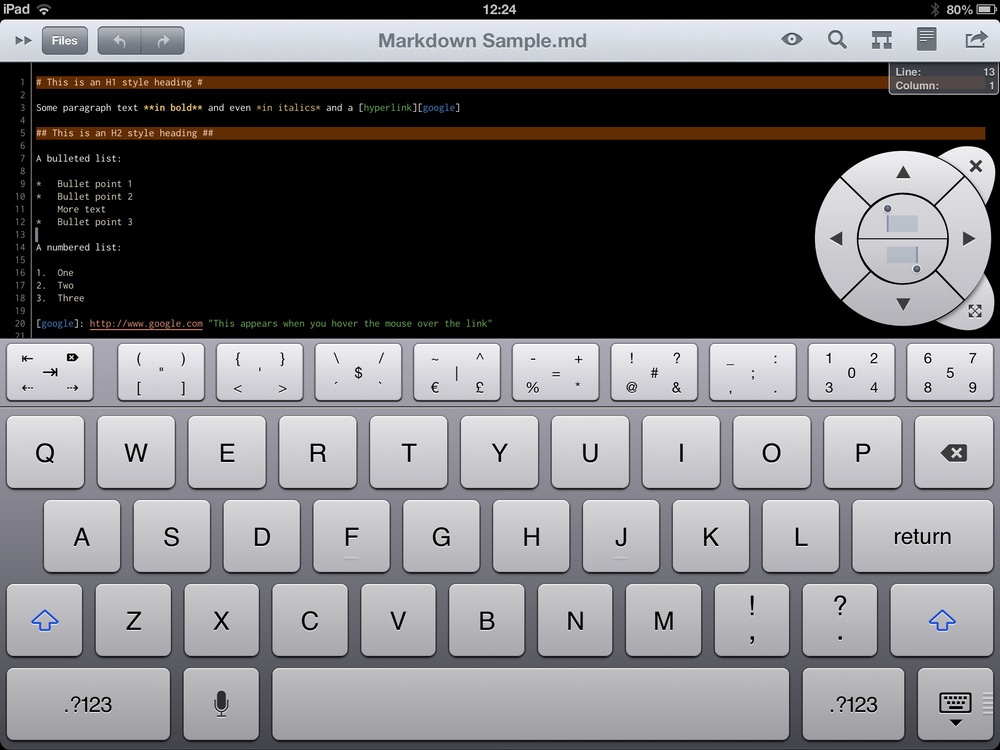
Here is a sample markdown document
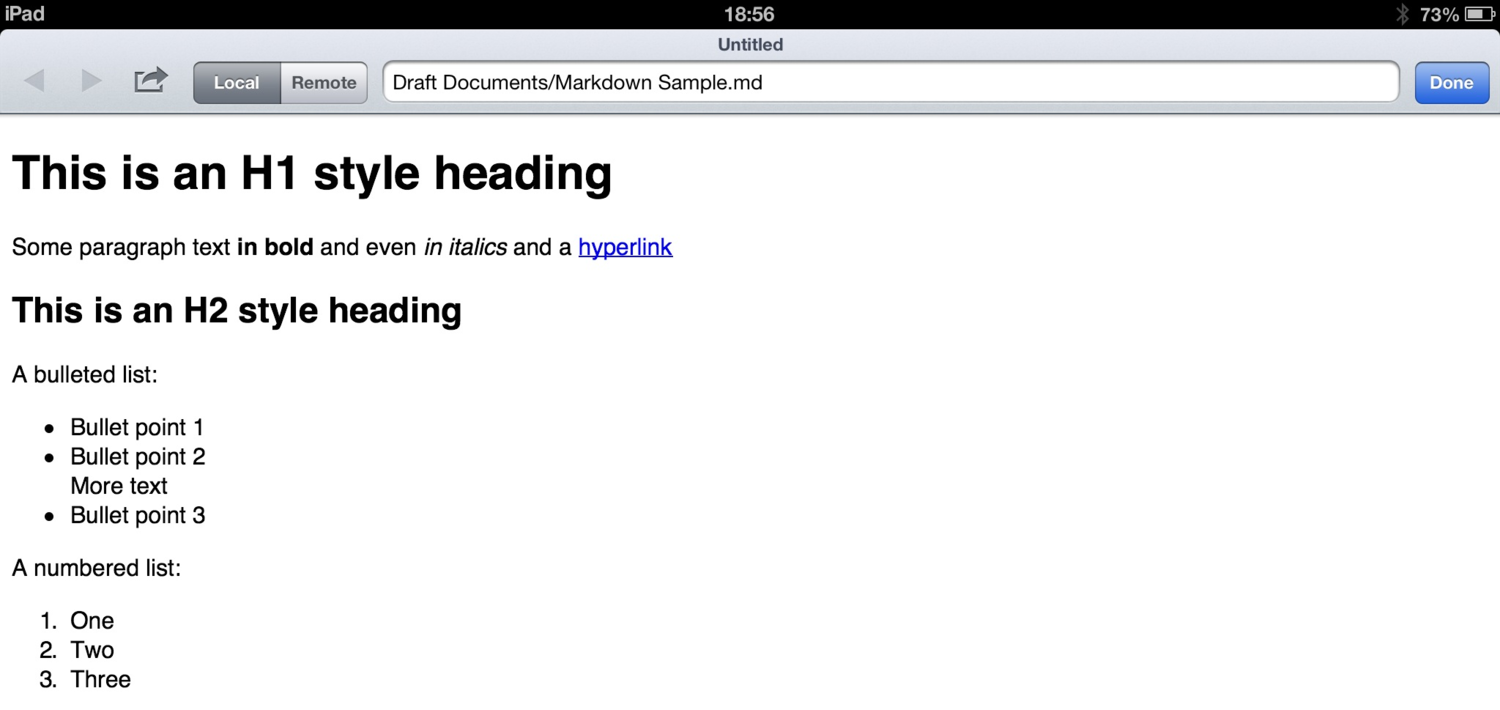
And this is what it looks like when it has been converted to HTML
Linking it all together
Computer
On the Mac, any text editor will do the job. My weapon of choice is TextMate 2. This comes with pre-installed Markdown plug-ins that handle syntax highlighting and HTML previewing. BBEdit is equally as good. The point is, it doesn’t really matter which one you choose. Even Notepad on Windows will do the job.
iPad
And so we get to the point of this nerdish dribble. Textastic for the iPad. Up until now, most of the iPad text editors that I have tried have followed a similar design model. Big fonts and a minimalist design. They all strive to create the fabled “distraction free writing tool”.
Textastic is a text editor for developers. In other words “A proper editor”.
The Textastic feature set is pretty impressive for an iPad editor:
- Syntax Highlighting for more than 80 languages
- Support for Textmate Themes
- Code Completion for HTML and CSS
- Sync with FTP, SFTP, WebDAV & Dropbox
- A pretty unique navigational HUD and software keyboard
Visually, it is very similar to TextMate 1 and crucially (for me), I can set a really small screen font.
Linking files to a Dropbox folder is a breeze. Markdown preview is one button press away.
The keyboard and HUD take bit of getting used to, but they are definitely a welcome addition.
Highly recommended.
-
Please use my link to sign up to Dropbox and we will both benefit by getting an additional 500MB of space for free ↩

